Important Note: This information is for students who started at UVM between Fall 2023 and Fall 2025. If you began at UVM in Spring 2023 or earlier, please go to this webpage. If you began at UVM in Spring 2026, please complete the “Registration 101” course. You should have received information about this in your UVM email and can find the course in your Brightspace account.
Registration for Fall 2026 opens in mid-April and it’s important that students prepare a solid registration plan. The steps/homework on this page will guide you through the process of course selection and registration for next semester.
Students are not required to meet with their academic advisor regarding registration but are welcome to schedule an appointment with/email their advisor if they have questions or need assistance. You will receive information from your advisor before registration about how to schedule with them.
Students who schedule an appointment with their academic advisor regarding registration are required to complete the following steps prior to that meeting or may be asked to reschedule. Please set aside a couple of hours to complete this homework.
Every student’s registration date is determined by the number of completed credits on their record. You can view the full Registration Schedule and credit amounts online, and by checking your registration status in myUVM. It’s important to also check your registration status before registration for any holds that may prevent registration.
QUESTIONS ABOUT REGISTRATION/CREDITS?
See our FAQs
QUESTIONS ABOUT TUITION/BILLING?
Contact Student Financial Services
QUESTIONS ABOUT HOUSING?
Contact ResLife
MORE QUESTIONS?
Check out the “More Helpful Information” section at the bottom of this webpage.
If you still aren’t finding the answer, you can contact Student Services at CAS@UVM.EDU or (802) 656 – 3344.
Step 1: Review Your Degree Audit/Requirements
Watch Video: Review The Components of Your Degree
This video will give you an overview of your requirements as a UVM student in the College of Arts & Sciences. (~2 minutes)
How To: Run & Read Your Degree Audit
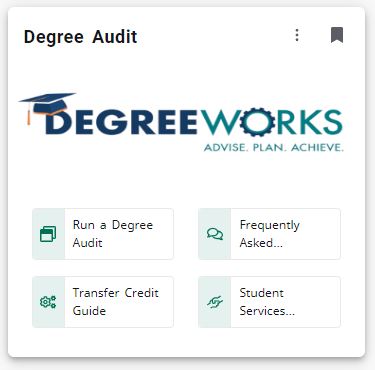
Your Degree Audit is the tool you will use to track your degree progress and requirements. You can access your degree audit in myUVM in the “Degree Audit” card. Click “Run Your Degree Audit.”
By looking at your degree audit, you will be able to identify degree applicable classes and register for the appropriate classes offered next semester.
The Degree Audit lists and tracks your requirements based on your declared major/minor. It keeps track of what requirements you have completed with previously earned credit, what requirements you are in-progress to complete (with current/un-graded credits), and what requirements you still need to complete.
For any requirements listed as “still needed” the degree audit will note 1) how many classes or credits are required, and 2) all the classes approved to fulfill those requirements. Not every approved class will be offered every semester, so students need to plan accordingly based on what is offered each term in the schedule of courses.
IMPORTANT: The first two sets of requirements you will see on your Degree Audit are the “Catamount Core” and the “AS Distribution Requirements.” Courses approved for the Distribution Requirements will also fulfill the Catamount Core requirements (but not necessarily the other way around) so you should be focusing on the Distribution Requirements, Major and Minor when selecting classes.
Thinking of changing/declaring your major or minor?
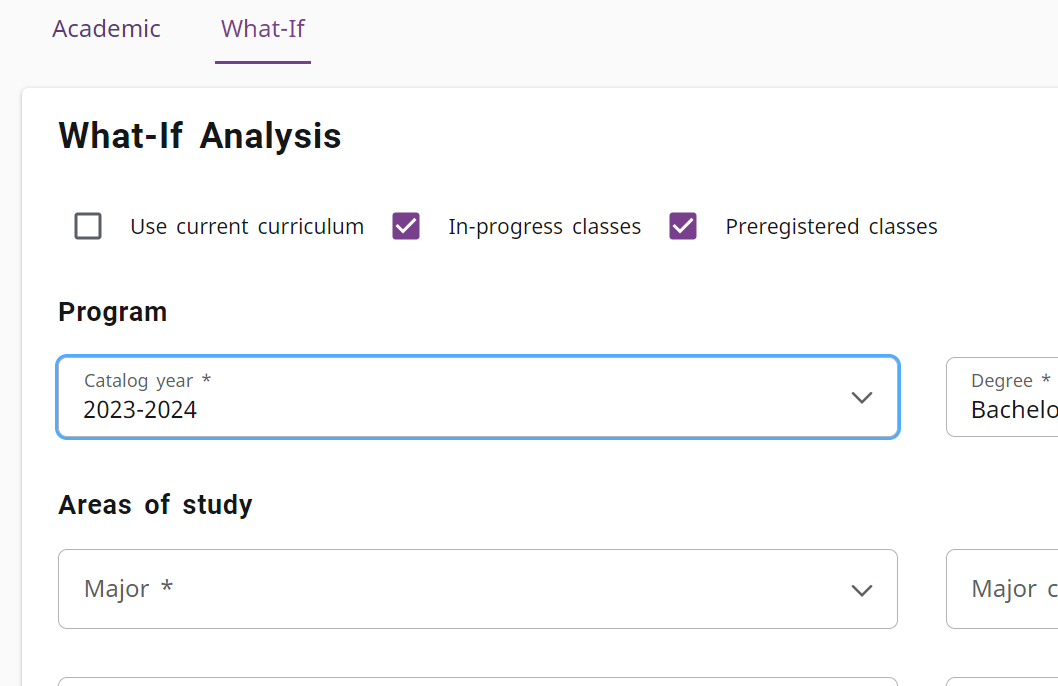
Students considering declaring or changing a major/minor may use the “What-If” tool in the degree audit to review those requirements and look for degree applicable course options. In your degree audit, click the small link to the upper-left labeled “what if” and select (from the “Areas of study” drop-down menus) the major/minor you are interested in reviewing. You’ll then scroll down and click “process” on the bottom right. Just like the normal degree audit, a “what-if” degree audit will show you what requirements you have already completed in any given major/minor, and what requirements you have left to complete (as well as the class options to choose from). If you are intending to change/declare your major/minor, we recommend that you submit the necessary form at least a few days before registration opens, since some classes are restricted to specific majors. You can change/declare your major/minor using this form located in your myUVM account in the “Change or Declare Major/Minor” card.
Want to double check your course plan?
You may also try using the “Look Ahead” feature to double check your “planned” courses. You’ll find the “Look Ahead” feature under the “What-If” link, just below the “Areas of Study” section. If you want to use the “Look Ahead” feature with your current major/minor, just select “Use current curriculum” under the What-If analysis section. The “Look Ahead” feature will show you where any courses you plan to register for will count in your degree audit, so you can make sure your planned classes are fulfilling the requirements you expected them to.

Pro Tip: Once you have actually registered for classes, run a new degree audit and you will be able to see where those classes are fulfilling requirements. If you selected a class that does not count, you can swap it out with an appropriate option. Keep in mind that you will need electives (classes that do not fulfill specific requirements) in order to reach the 120 credits required for graduation.
Step 2: Course Selection & Registration Planning
How To: Review The Schedule of Courses & Pick Classes
The Schedule of Courses for Fall 2026 will be released in mid-March. At that time, you will use the Schedule of Courses to look through the course offerings and start drafting a tentative schedule.
There are a few different ways that you can look through the classes being offered.
- The Schedule of Courses (used for planning purposes) – linked on the Registrar’s website and located in myUVM in the “My Courses” Card – click “Course Search”
- Look Up Classes to Add (used for planning purposes and for registering for classes) – located in myUVM in the “My Courses” card – click “Look Up Classes to Add”
- The Schedule of Courses (Classic Version) (used for planning purposes, but you can’t look courses up by requirement) – linked on the Registrar’s website
When using the Schedule of Courses, you can search for courses by the Liberal Arts/Core Skills requirement they are approved to fulfill. To see approved options, scroll down in the search box on the left and click the checkbox for the Liberal Arts or Core Skills requirement you are looking to complete. For example, as noted on the degree audit, the AS Distribution Requirement for Literature requires “1 class with attribute = AH2” so you would click the “Literature (AH2)” checkbox in the SOC search to find approved class options. (Students who began at UVM in fall 2023 or later should NOT use the General Education Categories requirement search.)

Since classes have limited capacity, you should pick out back-up options for each class. When putting together a schedule, here are some things to keep in mind and to look out for:
- Duplicate Credits: We recommend all students re-run their degree audit after they register to ensure they didn’t register for a duplicate course. You cannot receive credit for the same class twice, so duplicate credits will display at the bottom of your degree audit under “Not Counted.”
- Descriptions/Prerequisites: Reading course descriptions is a helpful way to learn more about a class/determine if it’s of interest to you. In the schedule of courses, course information including descriptions will be listed when you select a class in your search. Any restrictions or prerequisites will also be listed, so make of note of any that may render you ineligible to register for the class. If there are no restrictions preventing you from registering.
- Balance: Try to build a balanced schedule that consists of classes distributed relatively evenly across week. For instance, choosing 3 classes that meet on MWF, and 2 classes that meet on TR. It might be tempting to try and fit all of your classes on a couple of days so that you have others “free” but this is not typically advisable and can result in an unmanageable amount of work condensed onto specific days.
- Credits: A minimum of 12 credits is required for full-time student status, but in general students need to average 15 credits each semester to graduate in 4 years. The majority of classes are 3 credits so most students should aim to register for about 5 classes per semester.
- Variety: Apart from classes that you are required to take for your major or minor, think about working some variety into your schedule. Your University-wide/CAS degree requirements span across academic disciplines so you can generally create a schedule that encompasses classes from a few different subjects. If you already have a lot of Math/Science in your schedule plan, think about adding a Fine Arts (Studio Art, Art History, Music) or Humanities (English, Religion, Philosophy) to complement them. There isn’t any “rule” to this, just think about what types of classes you might enjoy taking alongside each other to create variety in your schedule.
- Map It Out: Use the Registration Worksheet (linked in step 3) to map out your schedule options and to make sure that none of the classes you are choosing have any time conflicts. Consider making back-up schedule options/filling out multiple registration worksheets.
- Write Down CRNs: You will need to know the CRN (course registration number) for classes in order to quickly register for them without manually searching each one (more on that in the “How To: Register” step below). You can find CRNs listed in the Schedule of Courses under the class title. Write down the CRN for EACH class you plan to register for.
How To: Register
For your first semester of classes, you worked with an advisor to register. After your first semester, you will be registering on your own, so it’s important you know how to navigate the registration system.
On the morning of registration, you will register for classes in your myUVM account. The registration system is typically available from 7:00AM until midnight (Eastern Time). Specific registration times can also be found by clicking the Check Registration Status (View Holds) link in the “My Courses” card in myUVM.
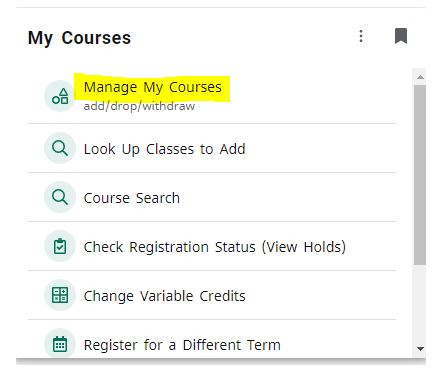
It’s important to first try to register for the classes that you’ve pre-planned as quickly as possible. The fastest way to do this is by clicking on the “Manage My Courses” button in the “My Courses” card in myUVM.
You’ll select the term and then type in the CRNs for your top 5 choices (you will see boxes titled “CRN” on the bottom of the page). Then click “Submit Changes.” This allows you to try and register for multiple classes at once.
If there are any classes that you don’t get into (See “Registration Error FAQs“), start entering back-up CRNs. If you try all of your back-up options and still need to find some additional classes to fill out your schedule, then you can click the “class search” button at the bottom of page to start searching for open spaces. This will take to you the Advanced Search page (which you can also get to from the “Look Up Classes to Add” link).
Pro Tip: The night (or early morning) before you register, check the schedule of courses to see if any of the classes you picked out are already full (the schedule of courses will note the capacity of each class, and how many seats are still available). This way, you can know ahead of time to go with some back-up options if some of your first-choice classes are full.
Need a refresher on searching for classes in the registration system? The video below will teach you how to search/register for classes in the UVM registration system. (~7 minutes)
Please note: While you will not have the Academic Advising hold referenced in this video, it’s still important you check for any other holds on your account that may prevent registration.
Step 3: Complete Pre-Advising Appointment Homework
To Do: Take Placement Tests (FLP & MPA)
Students planning to take their first semester of Calculus, Spanish or French at UVM are required to complete the appropriate placement test before enrolling. (If you enrolled this semester or in a previous semester, and plan to continue, you should just take the appropriate next level – no need to take the placement test.)
Please complete the placement tests at least 24 hours before your registration day:
→ Foreign Language Placement Test (~15-30 minutes to complete)
→ Math Placement Assessment (~60-90 minutes to complete)
To Do: Registration Advising Worksheet – Complete Before Your Appointment!
All students are required to complete a registration advising worksheet before their appointment and should have this form available to share with their advisor during the appointment. This worksheet will help you and your advisor make the most of your appointment time.
To Do: Check Registration Status/View Holds!
At least a week before registration, be sure to check your registration status/view holds. You can do this by clicking the Check Registration Status (View Holds) link in the “My Courses” card in myUVM.
This page will tell you 1) which date and time registration opens for you*, and 2) if you have any holds on your account that could prevent you from registering. Contact info will be listed for any offices you need to contact for questions about clearing up a hold.
*Every student’s registration date is determined by the number of completed credits on their record. You can view the full Registration Schedule and credit amounts online.
Don’t forget to set an alarm for registration morning!
We understand that this is a lot of information, and even after completing all the steps above, you will have questions! This is expected and there will be plenty of time to ask questions, either during the appointment with your advisor or over email.